Aviation Guide
Rendering the VVIP Cabin
A technical guide to private jet interior rendering — lighting the confined pressurised cabin and resolving the material honesty of exotic wood veneers, stitched leathers, and polished metals in aviation CGI.
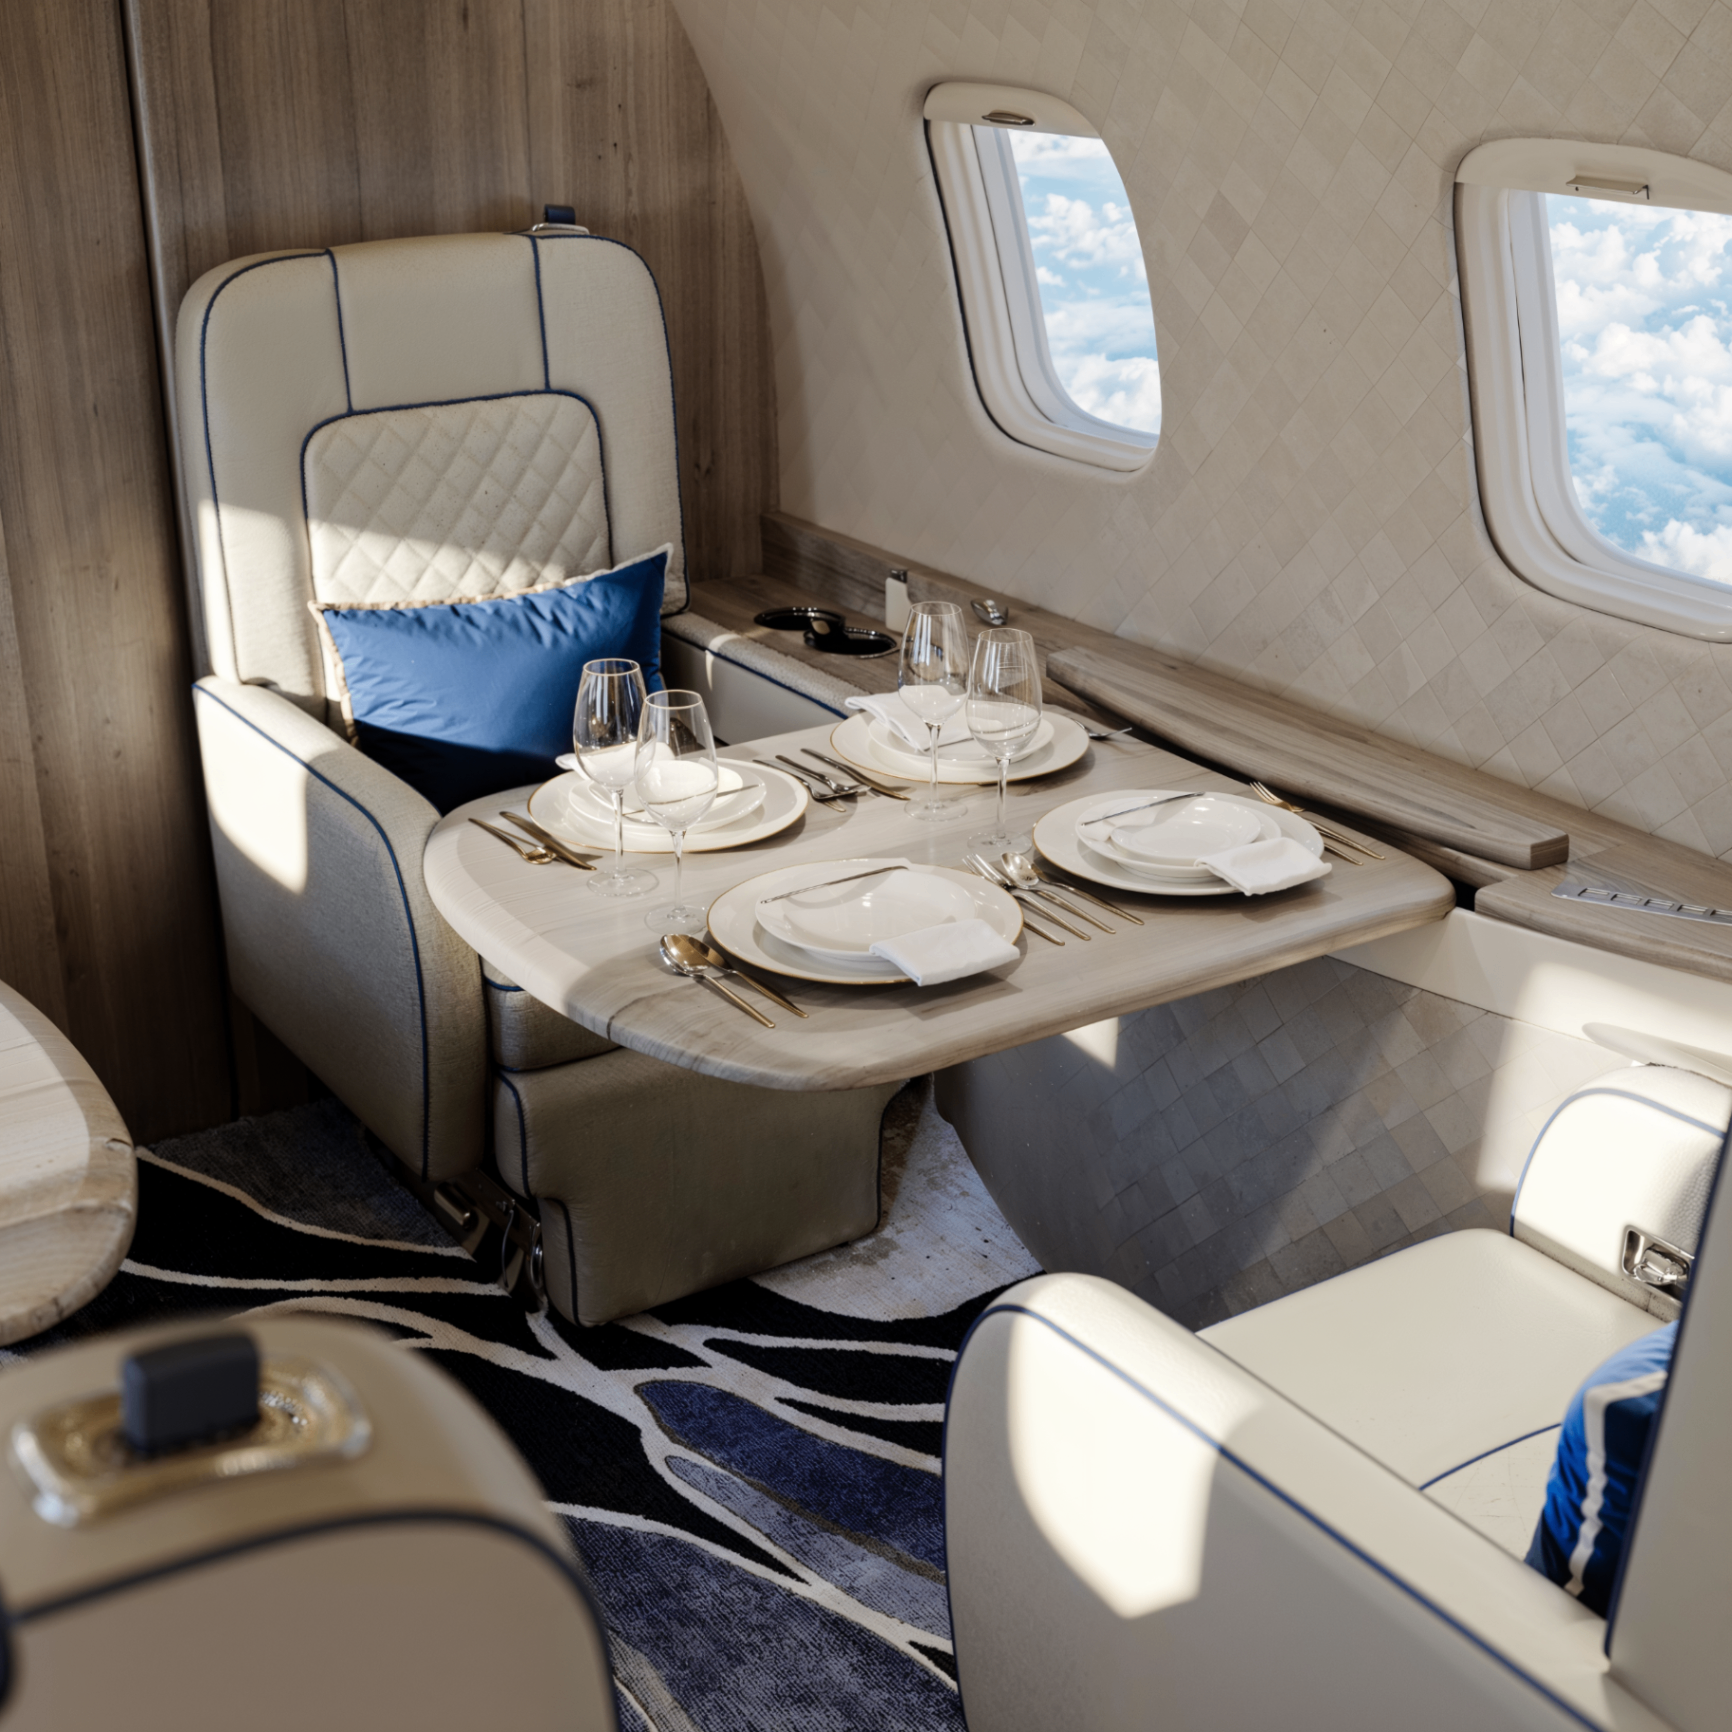
AirX VVIP dining study — burl veneer, hand-stitched hide, and a layered cove-and-spot lighting scheme rendered from a single seat of view.
Private jet interior rendering is the hardest cabin CGI a studio will ever be asked to make. The volume is small, the surfaces are reflective, and the client — an owner, a completions centre, or a VVIP designer — knows the aircraft type by tail and can tell a Global 7500 galley from a G700 in a single frame. There is nowhere for a shortcut to hide. What follows is the technical and creative workflow we use at Mosh Design when the brief is aviation CGI.
Stage One: The Camera Inside a Tube
The first constraint of any private jet interior render is geometry. A large-cabin business jet is roughly 2.1 metres wide and 1.9 metres tall on the floor. A standard 35mm lens will distort every vertical and turn the fuselage into a barrel. We default to virtual focal lengths between 16mm and 22mm for wides, and shift-lens simulation to keep the sidewalls parallel. The camera height is almost always set at seated eye-line — around 1.15 metres — because that is how the owner will see the cabin the moment they board.
Composition is dictated by the tube itself. Symmetry works beautifully in a jet cabin: club-four seating with a centre aisle, a dining group with mirrored divans, a bedroom looking aft to the private lavatory. When we break symmetry, we do so deliberately, using a diagonal camera at the transition between zones so the eye is invited from lounge, through galley, to stateroom in a single frame.
Stage Two: Lighting a Pressurised Cabin
A jet cabin has no real daylight. The windows are small, shoulder-height, and often shaded on the ground. Nearly every lumen in the final image is artificial, and the fixtures must be modelled as they will actually be certified: LED cove strips along the ceiling valance, wash-lights behind the sidewall upholstery, reading spots at each seat, table down-lights, and indirect floor path lighting. We build the lighting rig fixture-by-fixture with correct colour temperatures — typically 2700K for ambience, 3000K for task, and a subtle 4000K bias in the galley — and let the render engine resolve the mix.
Because the cabin is small, every light source is close to every surface. Falloff is aggressive, and specular highlights on lacquered veneer or polished nickel can blow out an entire zone if the intensity is even slightly wrong. We render lighting in separate passes — key, fill, cove, spot, practical — and composite them so the grade can lift the shadows without clipping the highlights. A private jet interior render lives or dies in that balance.
Window light, when it appears, is a considered choice. A golden-hour ramp shot with warm light pouring across the divan signals lifestyle. A cool overcast tarmac says operator. A night-cruise window with cabin lights reflected in the acrylic signals long-range luxury. The exterior HDRI is chosen for the story, not for the geography.
Stage Three: Exotic Veneers, Leathers, and Metals
Materiality is where aviation CGI is judged. The completions centre spent months matching a burl walnut to the owner's yacht; the render has to honour that specification. We model wood veneers as layered shaders: a base albedo scanned from the real sample, an anisotropic specular that follows the grain direction, a clear-coat lobe with its own roughness map, and a subtle bump for the pore structure. Book-matched panels are mirrored in UV space so the grain reads continuously across the sidewall, exactly as the marquetry shop will build it.
Leather is not a single material. A hand-stitched hide on a club seat needs subsurface scattering to catch the light along the bolster, a normal map derived from a photographed grain, and geometry-level stitching rather than a decal. The thread casts real shadow into the seam; that shadow is what tells the eye the leather is soft. Perforated inserts on a headrest are modelled as actual holes with backing fabric visible through them, not as an alpha texture.
Metals — nickel hardware, polished galley fittings, brushed trim rings — carry the reflections that anchor the cabin in space. We use measured IOR values and thin-film tints rather than generic chrome, and we place bounce cards outside the fuselage geometry so the reflections have something honest to catch. In a jet, a bad metal reflection reveals the render instantly.
Stage Four: Post as Cabin Atmosphere
Post-production on a private jet interior render is quieter than on a yacht exterior. The grade is warm but restrained, with the shadows held slightly cool to keep the wood from going orange under the 2700K cove. A faint volumetric haze reads as cabin air. A whisper of grain — a genuine film emulation, not a noise pass — pushes the image from render into photograph. The final deliverables are almost always a set: hero wides for marketing, tighter details for the specification book, and consistent grading across every zone so the aircraft feels like one coherent interior.
Why This Matters for Aviation CGI
A private jet interior render is a sales tool and a design document at once. Owners approve completions from these images; brokers use them to place aircraft; designers use them to defend material choices in front of a certification authority. The render has to be beautiful enough to close the sale and honest enough to survive a shop-floor walkthrough two years later. That is the standard we hold aviation CGI to — and it is why the same discipline we apply to superyacht visualization belongs on the flight deck as well.
See the full aviation rendering service for scope, deliverables, and how a VVIP cabin project moves from first reference to final image.